
Risograph printing is an environmentally friendly print method using stencils and soya based inks. Below you can find out more about how risograph printing works, how to prepare your files for print, and useful tips and tricks.

1. THE RISOGRAPH
Risograph printing has similarities to screen printing and photocopying. From a range of special riso inks each colour is printed separately and require a separate pdf and master.
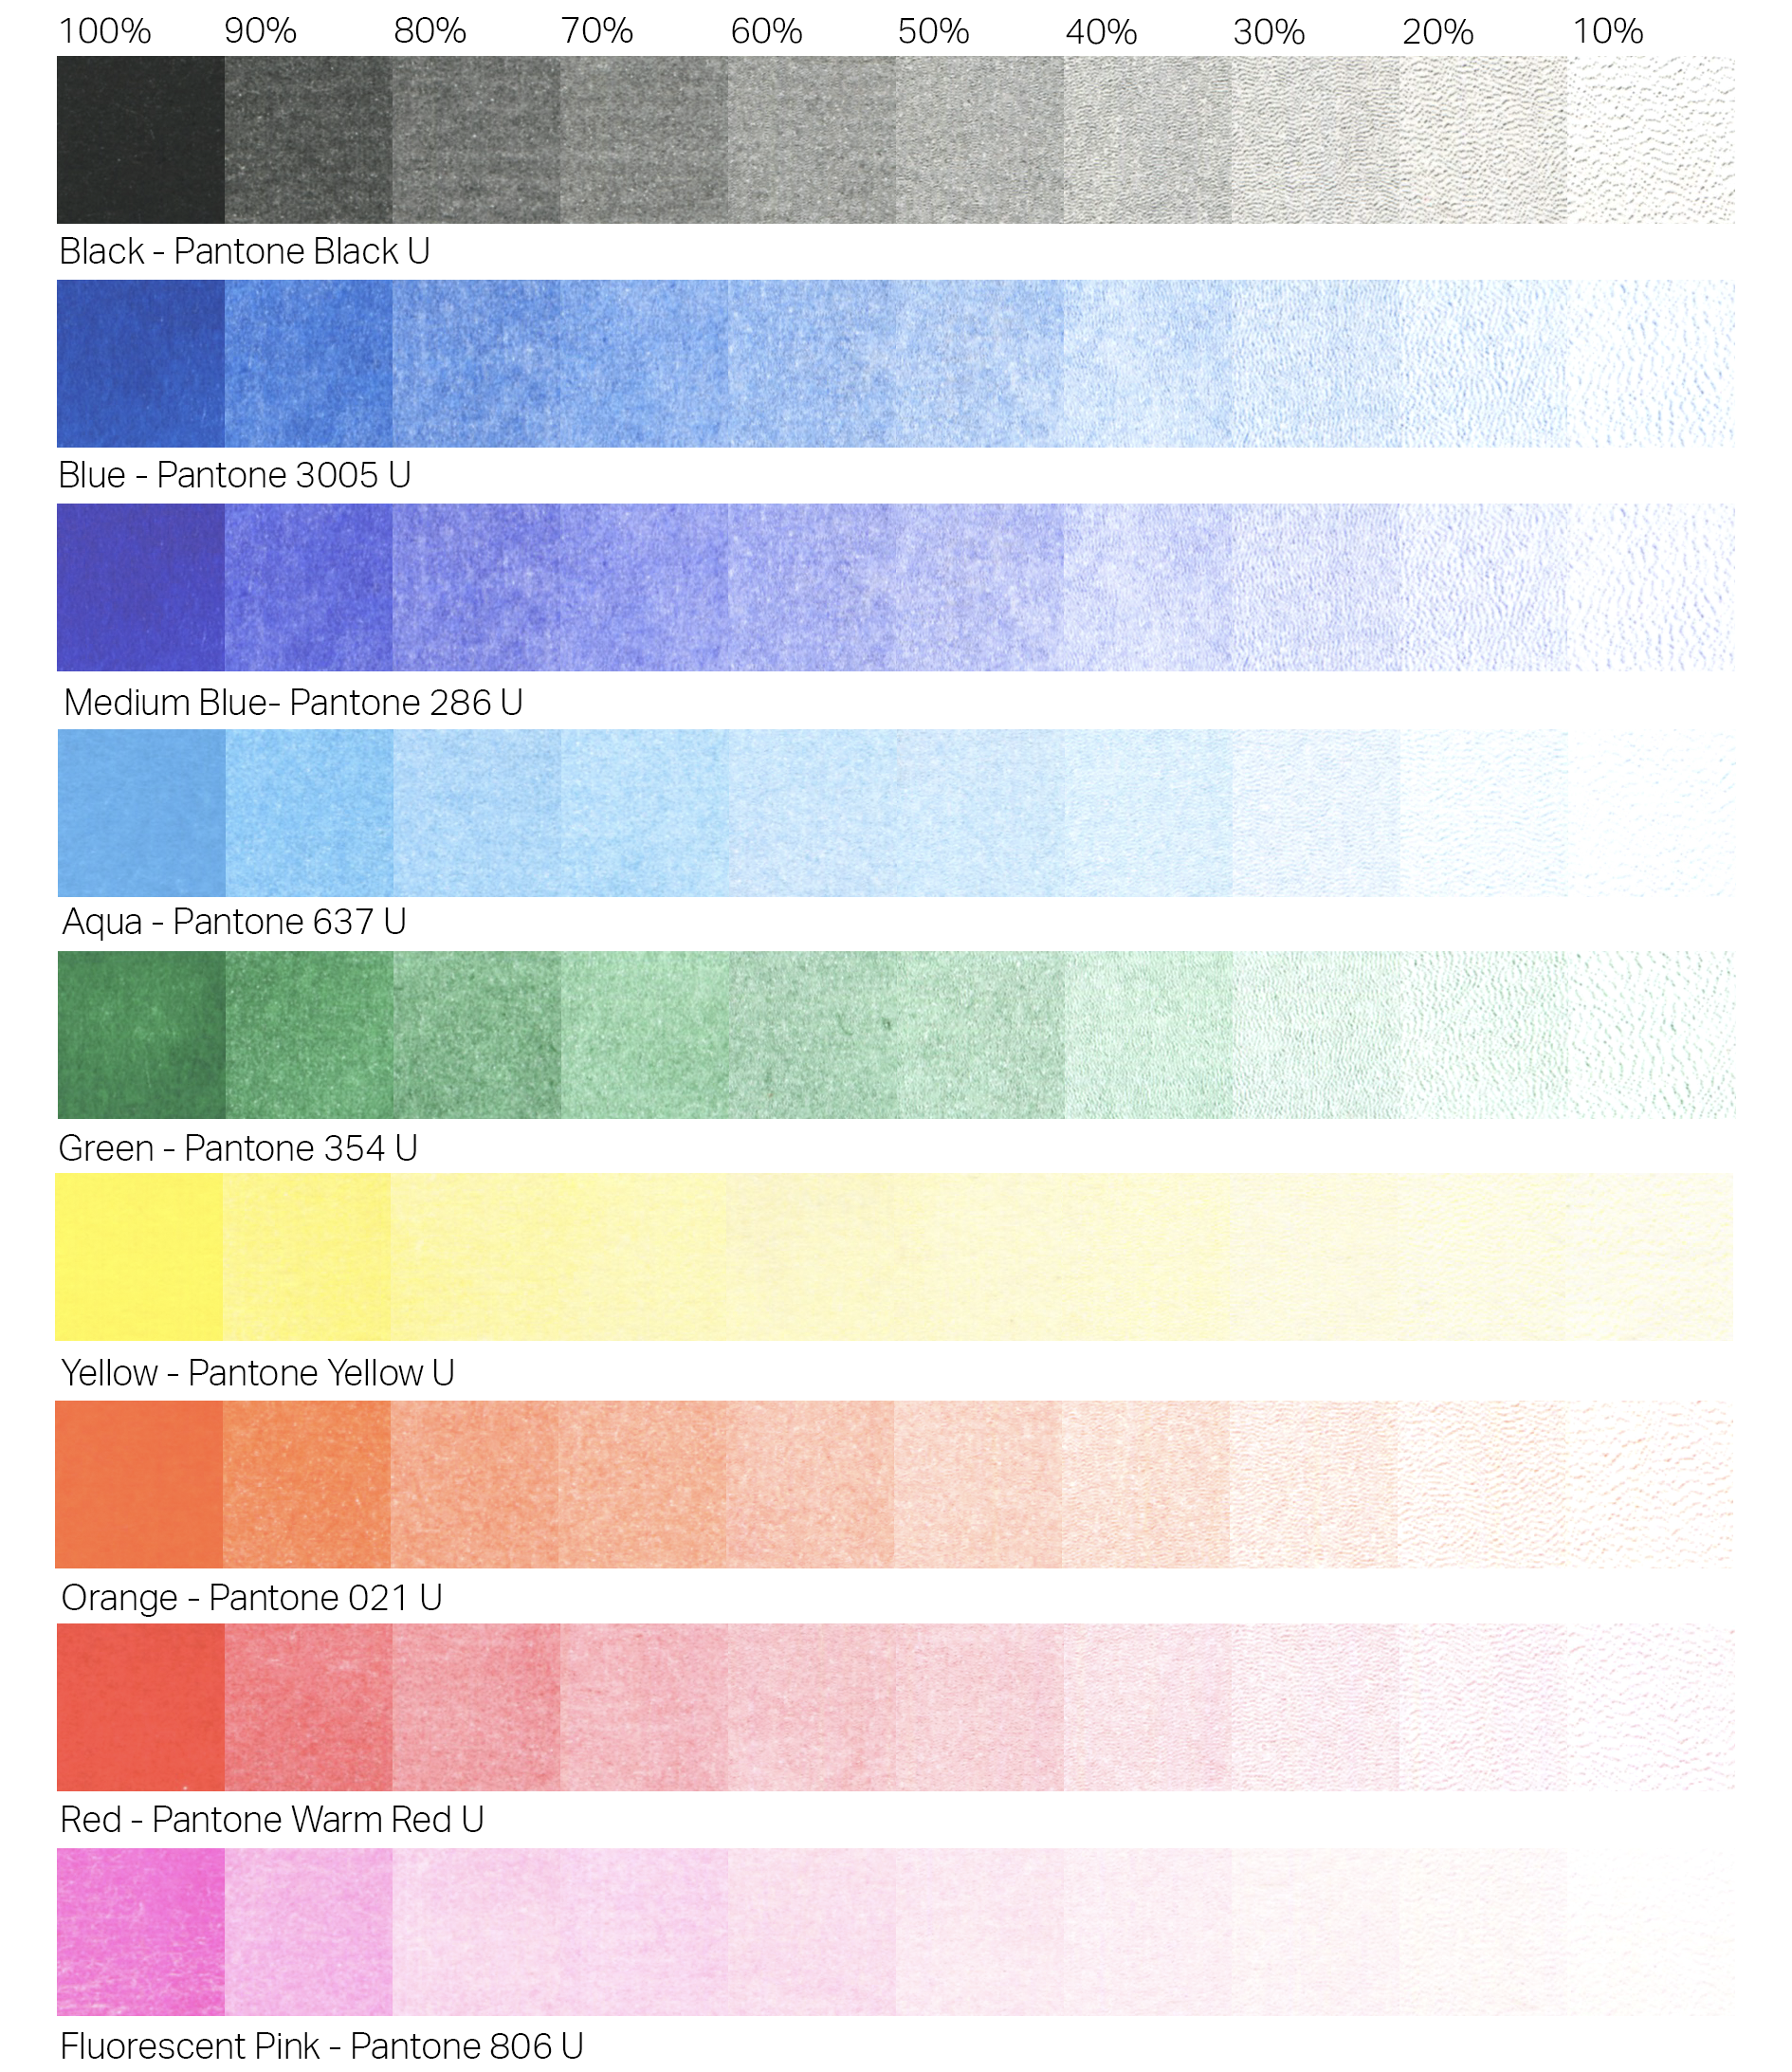
A master is similar to a stencil, or screen, which the printer creates from a black and white pdf. Any black areas on your pdf will be printed with full ink density, whilst the grey tones will be printed in lighter shades. Riso inks are transparent and can be overlayed to create new colours.
Our printer can print two colours at a time, for prints with more colours and double-sided print the paper is fed through the machine multiple times.

Each colour layer should be sent as a separate black and white file (pdf or jpg) and should be marked clearly with artwork name and ink colour. You can also send a psd file with each colour set up as separate black and white layers. Files should be at a 300dpi resolution.
Include a full colour reference (mock-up) of your designs.
Send us your files in either pdf, jpg or psd format via WeTransfer to ceciliepress@gmail.com.
The prints will look different to your digital mock-up (always better!). If the prints look very different we will get in touch before completing the print run.
If you have any questions about preparing your files for print get in touch and we can give you some advise or set it up for you for a small fee.
2. PREPARING YOUR FILES

Risgraph inks are transparent, which means you can overlay colours and create new ones. The black areas in your files will be printed at full ink density, whilst greytones will be printed in paler shades. We currently have 9 colours. The pantone numbers are for reference only and not an exact match.
3. COLOURS


4. PAPER
We stock:
Munken Pure Smooth Cream in 100gsm, 170gsm and 240gsm
Munken Lynx Smooth Natural White in 100gsm, 170gsm and 240gsm
Context Natural (100% recycled) in 100gsm, 170gsm and 250gsm
If you want to use a different type of paper (i.e. coloured paper) we can print on most uncoated papers between 90gsm and 250gsm, just get in touch and we’ll find the ideal paper for your project.


The lo-fi characteristics of risoprinting is what draws many people to the printing method. Although we print from digital files, the printer's distinctive grain and imperfections gives the artwork an analog quality. Below are some common issues with risograph and some tips on how you can work with them (or not).
5. TIPS AND TRICKS
Registration:
Print registration will never be 100% accurate. The likelihood of imperfections and misregistration increase with the number of colours used and with double-sided printing. This means we can’t guarantee a ‘perfect’ print, but it’s what makes the print method interesting.
Registration is most accurate in the centre of an A3 sheet, and less accurate towards the corners.

To avoid white gaps between two or more colours in your artwork you can use trapping, making each colour layer slightly overlap allowing for small registration errors.
Ink coverage:
Heavy ink coverage over large areas doesn’t agree with the risograph. 100% ink density should only be applied to roughly a quarter of the page. To cover a full page in one colour use 80% ink density or lower.
Large areas of flat colour can have waves and uneven coverage.
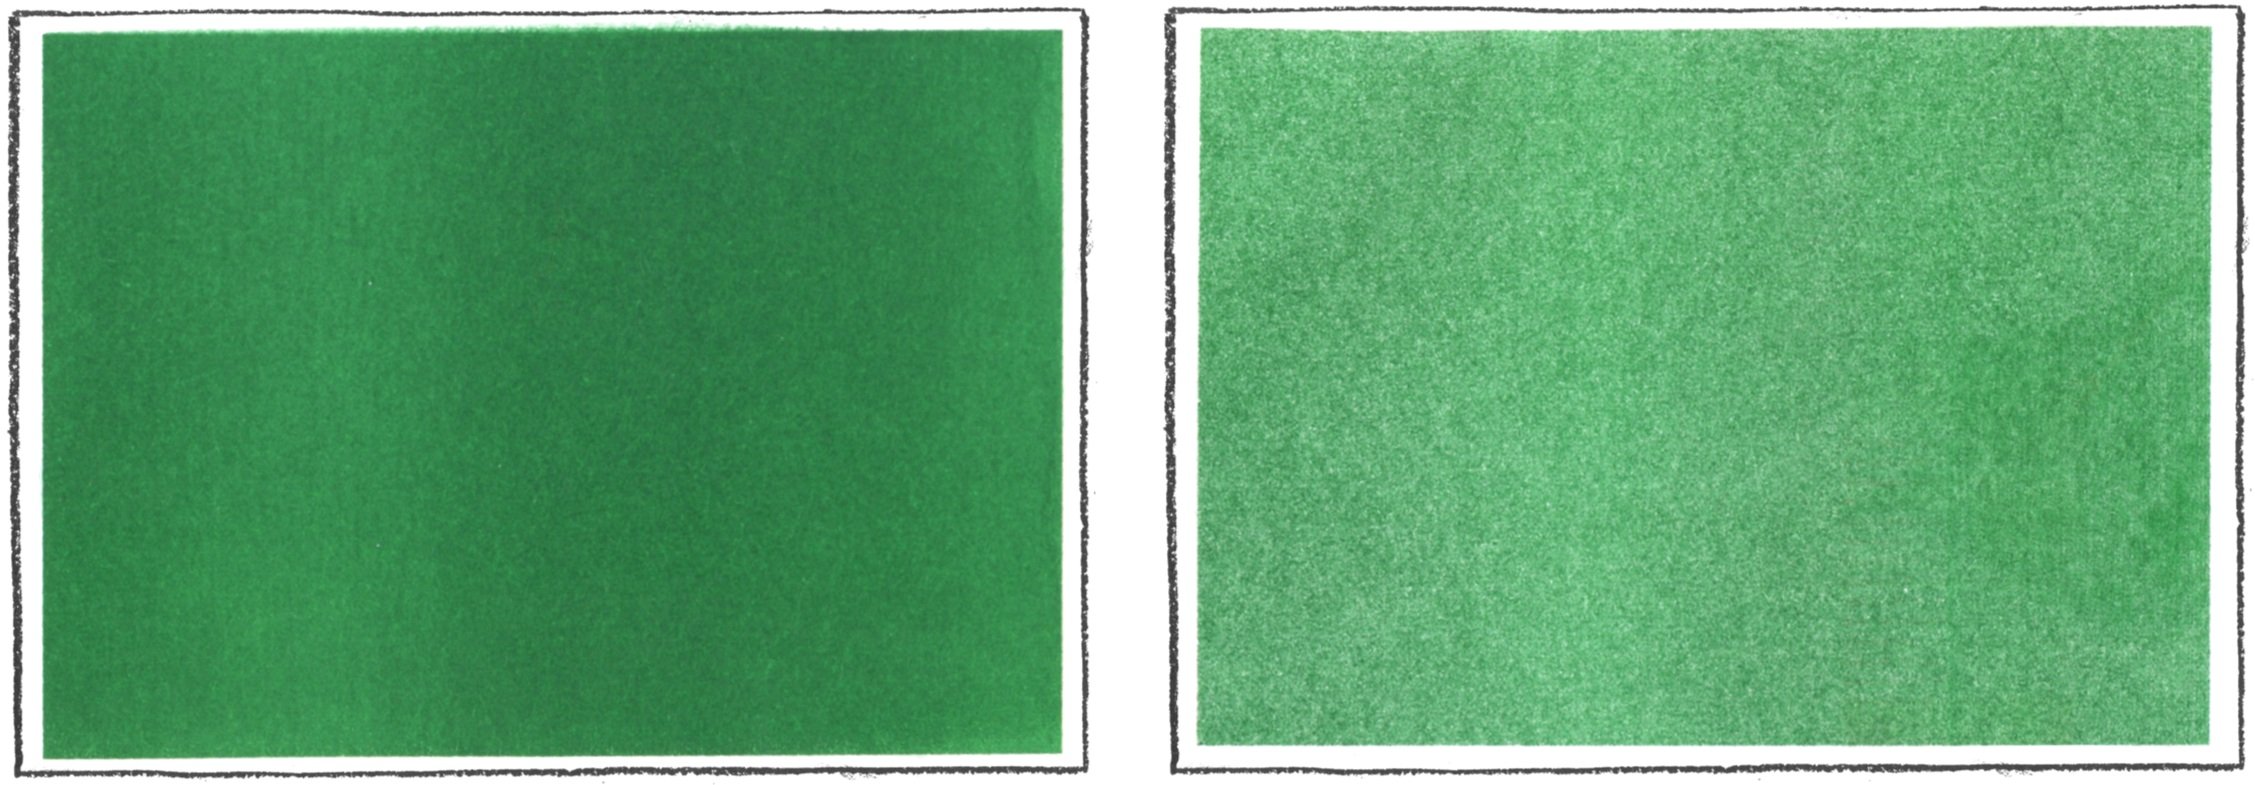
Roller marks and smudges:
Roller marks can appear when ink is transferred from the roller rubbers feeding the paper through the machine and can occur when printing more than two layers. To avoid this issue avoid having ink heavy artwork in the area shown in the image below.

The risk of marks and smudges increases with the complexity of the job, such as multiple colours and double-sided printing. We’ll do our best to avoid these marks appearing on your print, often they can be removed with an eraser, but it’s not always possible.
Text:
Set text in registration black outlined in indesign or illustrator (not rasterised) for crisp results, we recommend 6pt or larger. Overlaying text in multiple colours, small knock-out text and superimposed text over detailed artwork is not recommended. The same applies to small details in your artwork (i.e. overlaying thin lines).

6. FORMAT AND FINISHING

Our riso printer takes A3 sized paper (297mm x 420mm), with a printable area of ca 287mm x 410mm. Smaller designs are fitted onto an A3 and trimmed after printing. To make cost-effective full bleed prints we can work with reduced A-sizes.
We currently offer the following services:
Creasing and folding (i.e. for zines, greeting cards, booklets)
Round and straight corners
Hole punch (i.e. calendars, swing tags)
Various bookbinding: Coil binding, saddle stitch (staples), pamphlets
For other finishing services we can help you get in touch with the right people.
Below are some examples on how we can set up A5 sized artwork for print, using no bleed, full bleed or a reduced size.

Examples of some of the options we offer for folding, binding and other finishing services.


7. COSTS AND QUOTING
The artwork size and format, number of colours, print run and paper determines the cost of the print job.
To receive a quote send us an email on ceciliepress@gmail.com including:
Type of project (prints, zine etc)
Number of copies
Size and format
Number of ink colours
Paper quality